I'm a big fan of Office 365. Having access to Office across all my different devices and platforms has completely changed the way I work. In fact, I'm typing up this post in Word Online, because launching Word 2016 on my 7-year-old MacBook Pro would be painful. The web-based version of Word has allowed me to eke a few more years of service out of my MBP, and the tight integration with SharePoint means I don't have to worry about having files scattered across a bunch of different machines. It has taken a long time, but Microsoft has finally delivered a pleasant, browser-based experience for authoring documents.
Of course, Office 365 is more than just traditional Office. There's an ever-growing list of apps, designed to expand the Office experience. These include Sway, Delve, Bookings, Teams and, the focus of this post, Planner. Whenever one of these apps shows up in the app switcher, I always have the same two questions: what's it do? and who's it for?
What's it do?
Approaching Planner blind—without reading any blog post, reviews or articles—I'm not sure a typical Office user would be able to figure out what Planner does. It suffers from the dreaded blank screen syndrome. The first time I launched it I felt nostalgic for the old Contoso days of yesteryear. Would it kill them to have a sample plan? Or how about one of those cool overlays, like you see in iOS apps? Nope! The only thing you have to go on is a button that says New Plan. So, I clicked it.
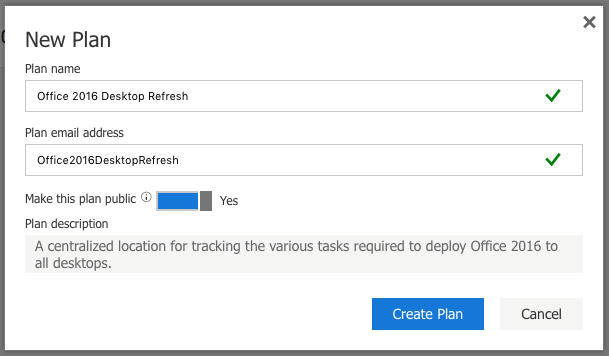
I was prompted to give my plan a name, an email address for your plan, and a description. I decided to see if I could create a plan for deploying Office 2016 to all desktops:
Once you've created a plan, you are prompted to add a task. That seemed simple enough, but everything else was very foreign. What were boards and buckets? Where were my co-workers? At this point I realized that I was going to have to do some research. Thankfully there was lots of information available from Microsoft and YouTube.
Once I watched a few videos and read a few articles, things become a lot clearer. Planner is yet another way to create a space for groups of people to collaborate. It shares some of the same goals and characteristics as the old SharePoint team sites. The twist is that it presents the data very differently than a traditional SharePoint site, thus the boards and the buckets.
Make a Plan
It took me a little while, but I finally did get the hang of Planner and was able to create a couple of plans for co-workers. Whether or not they use them remains to be seen. In order to spare you the humiliation of having to read an article or watch a tutorial, I've created a handy little cheat sheet.
- Identify your project. To get the most out of Planner you need a good candidate. Deploying Office 2016 to all desktops was not a good candidate for a first-time plan. I would start with something smaller in scope. I ended up focusing on just the training and support plan for the project in my sample plan.
- Create a plan and add your co-workers to it. The plan won't be very useful if you are the only one who can see it. You can click Add Members to add internal or external people to your plan. Keep in mind that external users will need to have (or sign up for) a Microsoft account.
- Add buckets to organize your plan. The default view in Planner is called the board, and it starts off with a to do list, but I found it easier to add buckets before adding tasks. Maybe that's just the way my brain works. According to Microsoft, buckets allow you to break your plan up into phases, types of work, departments, or whatever makes the most sense for your plan. I found that adding the buckets first made it easier for me to start thinking about the required tasks. My initial buckets were eLearning, ILT (instructor-led training), and floor support.
- Add tasks. Adding a task is fast and easy. Just type the name of the task and hit Enter and Planner is ready for your next task. There's no need to take your hands off the keyboard to quickly generate your task list.
- Categorize, assign and enrich your tasks. Once you have a good list of tasks going you can begin to organize them into buckets, using drag and drop. The process is very fluid and satisfying. Likewise, you can also drag a member's icon to a task to assign them to that task. Very cool. Clicking a task reveals the true power of Planner and helps to distinguish it from SharePoint team sites. You can add an enormous amount of rich information to a task, including labels, pictures, comments, attachments, checklists, start and due dates, and progress reporting.
Following these steps, I could create some pretty compelling plans; however, if you aren't willing to invest in step number 5, then the value of Planner is almost zero. This becomes immediately clear when you switch to the charts view. The board view helps you build your plan, but it's the chart view that keeps the plan on time and on track. This view allows you to identify unassigned tasks, overloaded workers and tasks that are behind schedule. It's very visual, but it does require that co-workers are properly reporting their progress against their assigned tasks.
Who's it for?
Which brings me back to the beginning: who's it for? I'm not sure I know. I can tell you it's probably not for me. I just don't see my co-workers investing time in keeping their tasks up to date. Especially since they are likely already tracking their tasks in competing applications, or in Outlook. That's the challenge of these new Office apps. Why use Sway when you can use PowerPoint? Why use Planner if you are already invested in team sites? The answer, of course, is that these applications offer a new experience that might potentially improve the way you work with others. But that means time, and time is in short supply these days. So Planner, while very cool, is another new app from Microsoft that I will likely end up removing from my Home tab in the app switcher, to be demoted to the sad catch-all known as All Apps.