Who knew about Outline View? I didn’t – but Dave did! This follows up from last week’s tip on Styles:
Create A Document Outline In Outline View
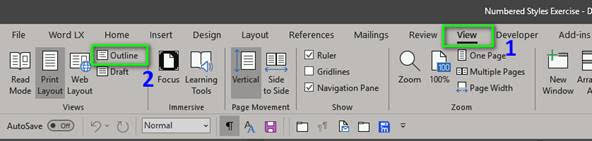
When you have a complex document to organize, Outline View (View > Outline) helps you focus on its structure. You can use Outline View to create or edit headings, adjust heading levels, and rearrange the content until everything is right where you want it.
It’s just a standard view function part of the Word Ribbon under the View Tab..I guess a little hidden gem as not many are aware of it but I use it all the time to catch ToC errors before creating one
Available in all versions of Word since I can remember…even before the ribbon!
Once selected you get a contextual Tab just for Outline functions – this is where you can also split up a large word doc into Chapters/Sub and Master.
No Addins or Plugins needed!

I also show how the Outline View and Levels can give a preview of a ToC and catch heading issues. Plus you can also drag and drop sections around in Outline as well

Click View > Outline. This automatically generates an outline and opens the Outlining tools.

If your document has headings (any heading levels from H1-H9), you’ll see those headings organized by level.
If your document doesn’t have headings and subheadings yet, the whole outline will appear as a bulleted list, with a separate bullet for each paragraph. The text in the bullets will show up as body text until you assign headings.
To assign or edit headings and heading levels and set up your document structure, see Use Outline View to manage headings and arrange text.
Use Outline View to manage headings and arrange text
Outline View helps you manage a document’s structure and headings without getting lost in the text. In Outline View (click View > Outline), you use Outline Tools to move and edit headings, change heading levels, and move text around. You can also control how much detail you see.
Once you're in Outline View, here’s how to work on your document:
|
To…
|
Do this
|
Keyboard shortcut
|
|
Create heading
|
Select the body text in Outline View and under Outlining, in Outline Tools click the Outline Level box and choose the heading level you want.
|
Alt+Shift+Left Arrow
|
|
Edit heading
|
Select the text in Outline View and make the changes you want.
|
|
|
Change heading level
|
Under Outlining, in Outline Tools, click the right and left arrows next to the Outline Level box to promote or demote headings.
|
Alt+Shift+Left Arrow or Alt+Shift+Right Arrow
|
|
Move text up or down
|
Select the text, and click the up or down arrows under Outlining.
|
Alt+Shift+Up Arrow or Alt+Shift+Down Arrow
|
|
Expand or collapse text
|
Select the heading, and click the + or - symbols under Outlining.
|
Alt+Shift+Plus Sign or Alt+Shift+Minus Sign
|
|
Show or hide some headings
|
In the Show Level box in Outlining, pick the lowest heading level you want to display. All levels lower than that will be hidden.
|
Alt+Shift+n shows all headings up to heading level n
|
|
Show first line of text or all text
|
Under Outlining, check or clear the Show First Line Only box.
|
Alt+Shift+L
|
|
Close Outline View
|
Under Outlining, click the X on the Close Outline View button.
|
|
|
Switch to another view
|
Click View, and click the type of view you want to switch to, such as Print Layout or Read Mode.
|
Alt+Ctrl+P for Print View, Alt+Ctrl+N for Draft View, Alt+Ctrl+O to return to Outline View.
|
Submitted by Dave Deopersaud, Osler, Hoskin & Harcourt LLP, Technology Learning Specialist, Toronto, Canada (with some more informational bits added by me).
#TipOfTheWeek