Documents often have footers that have right-aligned information at the right margin. This information is aligned through the use of tab stops. (The footer contains information aligned to the left margin and to the right.) If you change the margins for the document, the footer no longer aligns at the right margin; it aligns at the old right margin (the one you changed). Have you ever wondered if there is a way to have Word change the tab stops in your footer automatically whenever he changes the right margin for the document.
There are two ways that you can approach this problem. One way is to use a two-column, one-row table in your footer. Set the width of the table to 100% and make sure the information in the right-most cell is right aligned. When you later change the margins of the document, the table automatically adjusts width and your information is correctly aligned.
The other approach is to use "alignment tabs" for your footer information. Follow these general steps:
- Create your footer as you normally would, but don't set any tabs in the footer yet. (Just type the footer text.)
- Display the Design tab of the ribbon. (This tab is visible when you are working in the footer.)
- Click the Insert Alignment Tab tool, in the Position group. Word displays the Alignment Tab dialog box. (See Figure 1.)
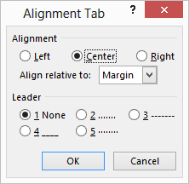
Figure 1. The Alignment Tab dialog box
- Specify that you want the tab alignment to be Right relative to the Margin.
- Specify a leader character, if desired.
- Click OK.
That's it; you've just set a tab stop at the right margin and it will adjust to match whatever your right margin setting may be.
From Tips.net…
Submitted by Julie Clegg
#TipOfTheWeek